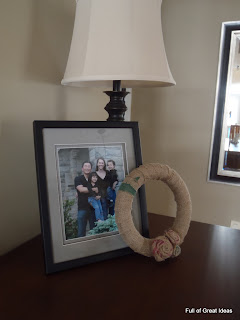
My version of the (ever so popular) burlap wreath and burlap flowers
My sister gave me this idea when I saw her last weekend. She told me that she used the free burlap sacs and a dollar store wreath to make an amazing burlap covered wreath with burlap flowers. I thought it was a fantastic idea. Since she didn't send me the photos of the one she made... I thought I would make my own. :)
This is extremely simple but a little messy. Here is a shot of my jeans while I was doing it. So be prepared to vacuum and clean yourself off.
I made the flowers first. You can find detailed tutorials all over the web on how to do this so I wont' bore you with great details. Start with a long strip of the burlap folded in half (I used a piece that had some color so it would show in the flower) and start rolling it. As you continue to go around, twist the burlap to make petals. Once it is to the desired size, glue the back with hot glue to hold in place. I then covered the back with a flat burlap just to make it pretty.
I then took another strip of the burlap and attached the one end to the wreath form using hot glue. Wrap the burlap around the wreath overlapping slightly.
Once you have covered the entire wreath it may be a little messy (like mine) from burlap fraying. If you like the messy look, leave it this way or if you are like me and want it neater, trim off these pieces.
Attach the burlap roses to the wreath with hot glue. I used small strip of burlap to hang the wreath.
The total cost for me today was $0 since I had everything on hand. I guess if I am honest with myself, I did buy the wreath a few months ago for $1..so it cost me $1 to make.
Thanks for looking.


Very cute and very shabby chic. I've read that if you wet the burlap a little bit - making it slightly damp - it's easier to work with (i.e., less mess). I'm not sure since I've never tried that, but I may now that I'm inspired to make a pretty wreath like yours!
ReplyDeleteCheers,
Tracy http://allthumbscrafts.blogspot.com
That is really pretty and so simple to make!
ReplyDeletelovely:)
ReplyDeleteLove these, you did a wonderful job on it. Thanks so much for linking up to Beyond the Picket Fence.
ReplyDeleteREALLY GREAT POST ADMIN THANKS FOR THIS WORTHY
ReplyDeleteopera for pc
opera mini apk download
opera pc download
http://www.operaminiforpcfreedownload.com/
opera vpn for pc
instagram pc windows
instagram best captions
mobdro apk update
zapya apk for pc
Shareit apk